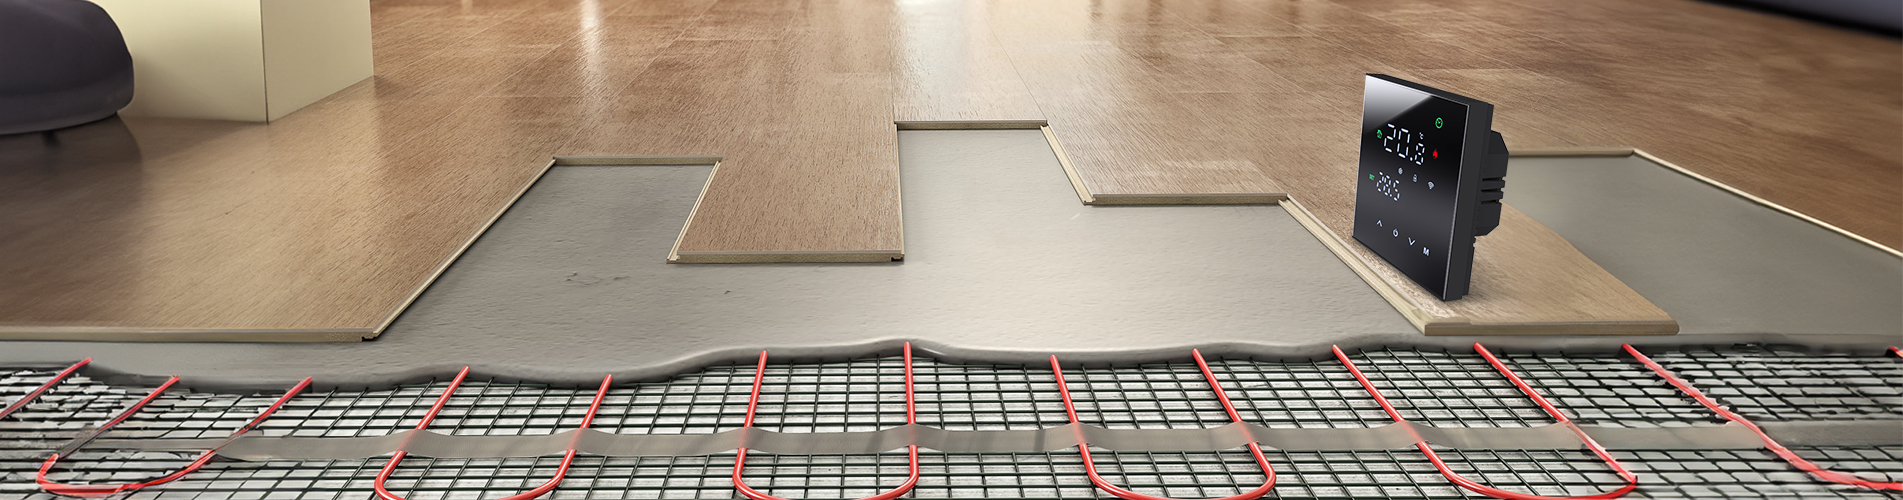
What are the precautions for the linkage between the thermostat and the radiator solenoid valve
Sep 20, 2025
The linkage between the thermostat and the radiator solenoid valve is the core of achieving automated temperature control in the heating system, and its stability directly affects the accuracy of room temperature, equipment life, and energy consumption. During the linkage process, it is important to focus on five dimensions: hardware matching, control logic, wiring safety, installation environment, and debugging and maintenance. Specific precautions are as follows:
1、Core premise: Ensure that hardware parameters are completely matched
If the parameters of the two do not match, it will directly lead to linkage failure (such as solenoid valve not working) or equipment burnout. The following key parameters need to be checked first:
Matching signal type and control mode
The output signal of the thermostat needs to be consistent with the input type of the solenoid valve:
If it is a switch temperature controller (only with an "on/off" signal), it needs to be equipped with an "on/off type solenoid valve" (normally closed solenoid valve, powered on and off);
If it is an analog temperature controller (such as 4-20mA/0-10V signal), it needs to be equipped with a "proportional adjustment type solenoid valve" (which can adjust the valve opening through the signal to achieve precise temperature control of ± 0.5 ℃) to avoid large temperature fluctuations caused by driving the proportional valve with a switch temperature controller.
Voltage and power matching
The output voltage of the thermostat must be consistent with the rated voltage of the solenoid valve coil (commonly AC220V household, DC24V industrial safety voltage). If the voltage is mismatched (such as using a DC24V thermostat to drive an AC220V solenoid valve), it will directly burn out the coil or cause the solenoid valve to fail to start;
The output power of the temperature controller should be ≥ the rated power of the solenoid valve coil (e.g. the power of the solenoid valve coil is 5W, and the output power of the temperature controller should be ≥ 5W), to prevent insufficient power from causing the solenoid valve to "half start" (the valve core is not fully opened, and the valve is not tightly closed).
Load capacity matching
If a temperature controller is linked to multiple solenoid valves (such as multiple room radiators), the total load power (single power x quantity) needs to be calculated to ensure that it does not exceed the maximum output load of the temperature controller (such as a rated load of 20W for the temperature controller, up to 4 5W solenoid valves can be linked), in order to avoid overloading and burning out the temperature controller.
2、Control logic setting: Avoid frequent start stop and temperature control deviation
The core of linkage is "precise command of temperature controller and precise execution of solenoid valve", which requires reasonable setting of control logic to balance temperature control accuracy and equipment life:
Reasonably set "dead zone"
Return difference is the temperature difference at which the temperature controller triggers the solenoid valve to "open/close" (such as setting a room temperature of 22 ℃ and a return difference of 1 ℃: the valve opens when the room temperature is less than 21 ℃ and closes when it is greater than 22 ℃);
A small hysteresis (such as<0.5 ℃) can cause the solenoid valve to start and stop frequently (more than 10 times within 1 hour), accelerate the wear of the valve core seal, and shorten its service life; Excessive hysteresis (such as>3 ℃) can cause large fluctuations in room temperature (such as 19-22 ℃), affecting comfort; Suggest setting 1-2 ℃ for household scenarios and 0.5-1 ℃ for industrial high-precision scenarios.
Add 'Start Stop Delay' function
The thermostat needs to activate the "delay trigger" (such as closing the valve after a 30 second delay when the temperature reaches the standard, and opening the valve after a 10 second delay when the temperature is below the set value) to avoid short-term temperature fluctuations (such as opening or opening windows causing a brief decrease in room temperature) that trigger the solenoid valve to malfunction and reduce ineffective start stop.
Linkage security protection logic
The thermostat needs to be equipped with "over temperature protection": when the room temperature exceeds the safe threshold (such as 30 ℃ for home use or 40 ℃ for industrial use), or when the solenoid valve continues to be powered on for more than 1 hour without reaching the temperature (possibly due to valve core blockage), the power supply of the solenoid valve should be automatically cut off to prevent the system from overheating or coil burnout;
If it is a steam heating system, it needs to be linked with "pressure protection": when the pipeline pressure exceeds the rated pressure of the solenoid valve (such as 1.0MPa), the temperature controller needs to forcibly close the valve to avoid damage to the valve body due to high pressure.
3、Wiring specifications: eliminate short circuits, interference, and poor contact
Wiring is a linked 'nerve line', and improper operation can lead to signal loss and equipment burnout. The following requirements must be strictly followed:
Power off operation, distinguish line types
Before wiring, the main power supply of the heating system and the power supply of the thermostat must be cut off to avoid electric shock or short circuit;
Clearly define three types of routes:
Temperature controller "power cord" (such as AC220V L/N): connected to mains power, requires a 10A circuit breaker;
Temperature controller "control line" (connected to solenoid valve coil): Use RVV2 × 0.75mm ² shielded wire (to reduce interference), with a length not exceeding 10 meters (too long will cause signal attenuation);
Temperature controller "sensor wire" (such as NTC temperature sensor): Use a single core shielded wire to avoid parallel laying with strong electricity (power cord).
Avoid electromagnetic interference
Control lines and sensor lines need to be laid separately from strong electrical lines (such as air conditioning lines and socket lines), with a spacing of ≥ 30cm, or threaded through different metal cable trays (such as galvanized cable trays) to prevent the magnetic field generated by strong electricity from interfering with the temperature controller signal and causing electromagnetic valve misoperation (such as inexplicable opening/closing);
If the line needs to pass through walls or floors, it needs to be protected with PVC pipes to avoid cable damage and short circuits.
4、 Installation environment: Ensure accurate detection of temperature controller and stable operation of solenoid valve
The rationality of installation location directly affects the accuracy of linkage instructions, and the following misconceptions should be avoided:
Temperature controller installation: stay away from "temperature interference sources"
Do not install it directly above/on the side of the radiator (at a distance of ≥ 1.5 meters), at the air conditioning outlet, or in direct sunlight (such as near a window), otherwise the detected "local high temperature" will cause the thermostat to misjudge that the room temperature meets the standard and close the valve in advance, resulting in a lower actual room temperature;
It cannot be installed in corners, wardrobes, or poorly ventilated areas (such as in bathroom ceilings), as uneven temperature in these areas can lead to temperature control deviations (such as corner temperature of 18 ℃ and living room temperature of 22 ℃);
It is recommended to install it in the middle of the room at a height of 1.5-1.8 meters (consistent with the perceived temperature), and there should be no obstruction around (such as furniture obstructing the sensor).
Electromagnetic valve installation: ensure "smooth operation"
The solenoid valve needs to be installed horizontally, with the coil facing vertically upwards (to avoid loose closure of the valve core due to gravity offset), and the axis of the valve body should be consistent with the axis of the pipeline. It is not allowed to install it tilted or inverted;
The distance between the solenoid valve and the temperature controller should not be too far (control line ≤ 10 meters). If it exceeds 10 meters, shielded wire and thicker wire diameter (such as RVV2 × 1.0mm ²) should be used to prevent signal attenuation;
A Y-shaped filter (with an accuracy of 80 mesh) must be installed before the solenoid valve to prevent scale, welding slag, and rust from blocking the valve core in the pipeline - valve core blockage can cause the solenoid valve to "not close tightly" (leak water/steam), and the temperature controller cannot accurately control the temperature.
5、 Debugging and maintenance: ensuring long-term stable linkage
After the linkage is completed, the effect needs to be verified through debugging, and daily maintenance needs to pay attention to the status of both simultaneously:
Linkage debugging steps
Step 1: Manually test the action of the solenoid valve - apply the rated voltage directly to the solenoid valve and observe whether the valve core opens/closes smoothly (listen for a "click" sound), without any jamming or leakage;
Step 2: Thermostat linkage test - Set the room temperature (such as 22 ℃), use a hair dryer (low temperature mode) to blow towards the thermostat sensor (simulating an increase in room temperature), and observe whether the solenoid valve closes in time; Place an ice pack close to the sensor (simulating a decrease in room temperature) and observe whether the solenoid valve opens in a timely manner. The action delay should be ≤ 3 seconds;
Step 3: Steady state test - run continuously for 24 hours, record the fluctuation range of room temperature, which should be ≤ ± 1 ℃ (household) or ± 0.5 ℃ (industrial), and the number of times the solenoid valve is started and stopped should be ≤ 5 times/hour.
Key points of daily maintenance
Regular inspection of the circuit: Check the wiring terminals between the thermostat and solenoid valve for looseness and whether the cables are aged (such as cracked outer skin) every month. If any problems are found, tighten or replace them in a timely manner;
Clean the sensor: wipe the temperature sensor (such as NTC probe) of the thermostat with a dry soft cloth every quarter to avoid dust covering and affecting the detection accuracy;
Maintenance of solenoid valve: Before and after the heating season each year, turn off the power and main valve, disassemble the solenoid valve core (follow the instructions), rinse impurities with clean water, and apply a small amount of high-temperature lubricating grease (such as molybdenum disulfide) to prevent valve core jamming; At the same time, check the sealing components (such as PTFE sealing rings) and replace them promptly after aging to avoid leakage.
Summary
The core of the linkage between the thermostat and the radiator solenoid valve is "matching, precision, and safety": first ensure that the hardware parameters are consistent, then achieve stable communication through reasonable control logic and wiring specifications, and finally ensure long-term reliable operation through correct installation and regular maintenance. If it is a complex system (such as multi floor, multi zone heating), it is recommended to have professional personnel carry out linkage design and debugging to avoid equipment damage caused by parameter mismatch or improper operation.
Read More


 IPv6 network supported
 English
 English
 Français
 Deutsch
 Русский
 Italiano
 Español
 Português
 عربي
عربي Polski
 Magyar
 zh-CN
zh-CN